A partition is nothing but a logical division of a physical disk. Partition makes it easy to organize and share the data of that disk. You can edit or manipulate these partitions for various purposes.
For example, it is useful while sharing files on a network you can share the data of a partition without worrying about the data of other partitions. Similarly, You can install multiple operating systems on a single physical drive, by dividing it into multiple partitions. Different partitions can be formatted into different filesystems.
Linux root partition by default, contains all the system files, program settings, and documents. Ahead in this article, we will see more about it.
What is the root partition in Linux?
A root partition always required for installing Linux OS. “/” is the mount point of the root partition. The root directory in the Linux filesystem hierarchy is the starting point for all other mount points or the ramdisk etc.
By default it contains all the system files program settings and documents etc. In Debian and align distributions, it is recommended to use at least 15GB of space for the root partition.
It may vary for different Linux distributions. Linux partitions including root partition generally use an ext4 filesystem. If you assign less amount of space to the root partition it may full after some time then you will have to expand its size later.
Resizing the “/” Root partition using GParted
Gparted (also known as GNOME partition editor) is a free partitioning tool. This is a GUI application that uses GNU parted in the backend. Gparted is used to create, delete, or resize a partition without data loss.
Apart from this, it offers many other functionalities such as mirroring one partition with others. By using Gparted in a live OS we will able to access all the features. This way we can use tools for any other partition which contains a different OS like windows or mac. Now if you want to resize a partition use the following steps.
How to resize a partition, step-by-step guide
- First, check the available partition in your system by using-
sudo fdisk -l
And identify the partition that you are going to resize.
- Now boot your system with a Linux Bootable Live disk. Here I will use a Linux Mint live USB. You can visit the following link if you don’t know how to make USB bootable in Linux/Unix.
- Next, connect the system to the internet if it is not connected already. And then open your terminal by pressing ctrl + alt + t and execute the following command to install GParted.
sudo apt-get install gparted
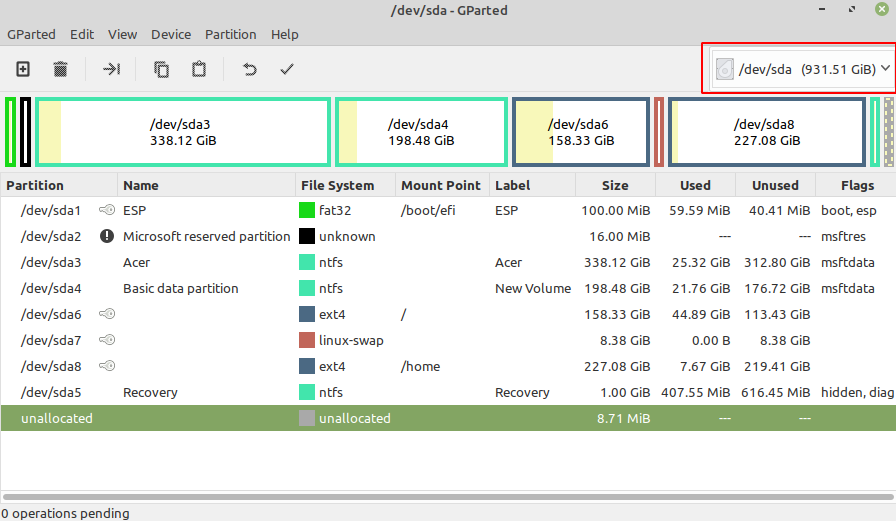
- Launch the GParted tool from the menu. Click on the drop-down menu given at the upper right corner which is highlighted in the red. And select the hard drive where the partition is located. Look at the image below-

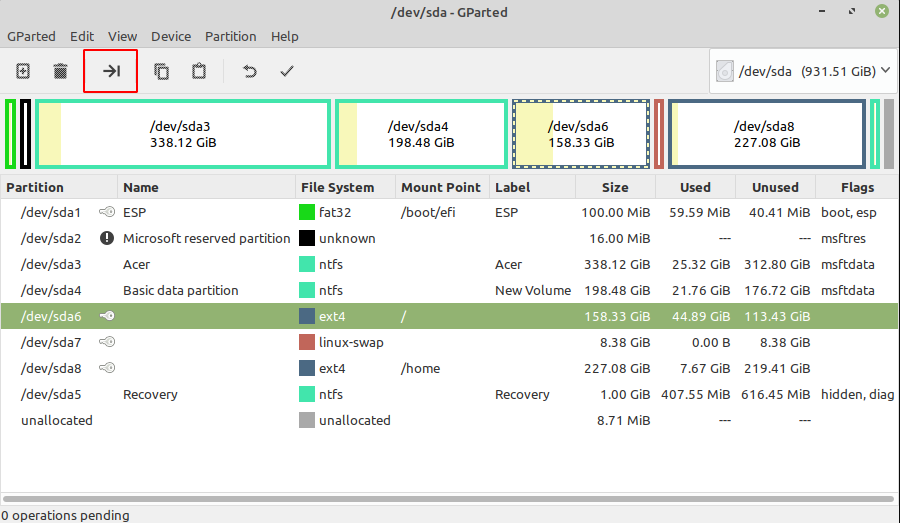
- Next, select the partition from the list that you want to resize. And click on the resize icon for resizing your partition. See the image below the Resize icon is highlighted in the red –
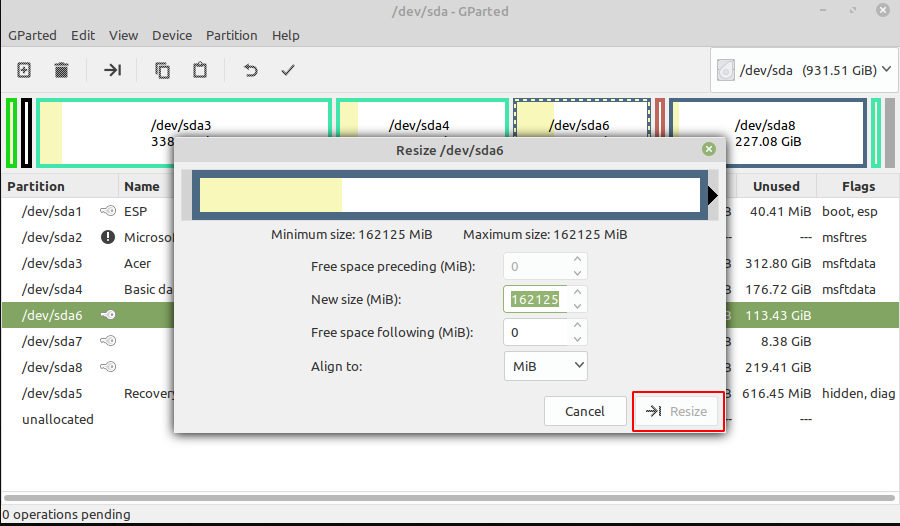
- Once you select a partition and click on resize, a new resize window will open. Now fill the new size of the partition in MB and then click on the resize button.

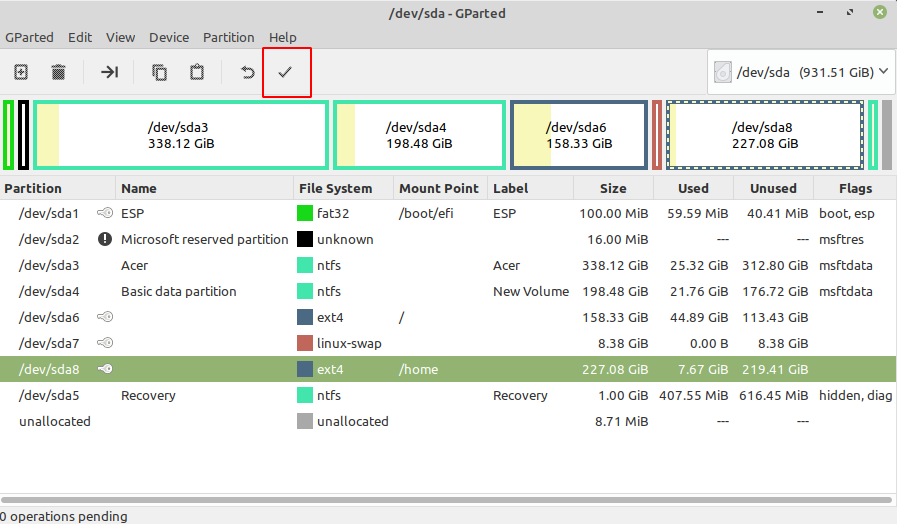
- Now click on the icon highlighted in red to apply all operations this will make the changes permanent.
Conclusion
There are other methods also available by which you can resize a partition, for example, you can use Gparted live. I may consider to cover the GParted Live in a new article.
I hope this article is useful to you and if you have a query or suggestion related to this article then write us in the comments below.