Kazam is a simple multi-functional tool that is used for taking screenshots or recording content of a screen in different video formats. You can control the functions of Kazam such as start recording, pause/resume recording, finish recording, etc by using keyboard shortcuts.
In this article, I will discuss how to install and use the Kazam screen recording application in Ubuntu.
Features of Kazam application
The key features of Kazam are –
- Free and opensource
- You can easily capture screenshots
- Allows variable recording of your screen
- It also captures mouse clicks and key presses
- It can also record voice from a microphone or speaker
- You can stream live on platforms like youtube
How to install Kazam in Ubuntu
There are multiple ways using which you can install Kazam on your Ubuntu system. Now you can use one of the given methods to install it on your system.
Installing Kazam from Ubuntu’s default repository
The Kazam is available in the default repository of Ubuntu. So you can directly install it by using the apt command or from Ubuntu Software.
First, run the given command update apt package index –
sudo apt updateNext, use the given command to install Kazam on your system –
sudo apt install kazamInstalling Kazam from its Unofficial PPA
Another way to install Kazam is to add its unofficial PPA repository and then install it. The benefit of using this method is you can get the latest stable version of Kazam on your system.
So first use the given command to add Kazam on your system –
sudo add-apt-repository ppa:sylvain-pineau/kazamNext, run the update command to refresh the apt package repository –
sudo apt updateNow use the given command to install it on your system –
sudo apt install kazamPress y and then enter when it asks for your confirmation.
You can verify the installation by using –
kazam -vThis will display the version of Kazam installed on your system.
![]()
How to use Kazam in Ubuntu
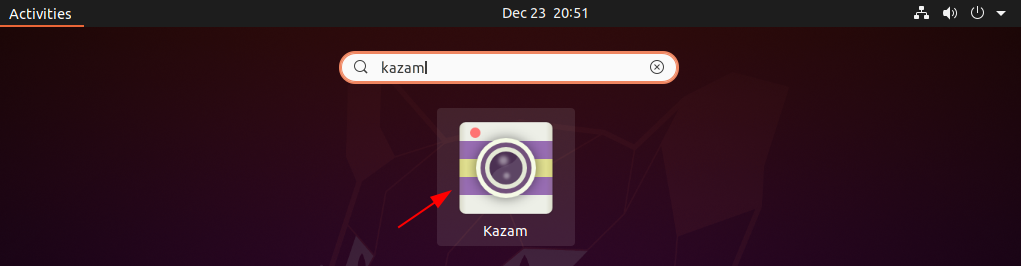
Once the installation is completed you can launch Kazam from the Ubuntu applications menu.
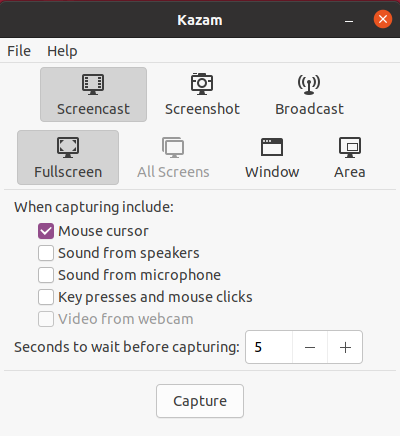
You can see the GUI of Kazam in the image below.
Taking screenshots using Kazam
To take a screenshot just click on the Screenshot options and select among Fullscreen, Window, or Area as given on the UI. Click on Capture if you selected the Fullscreen option else you need to select the area or window to take a screenshot.
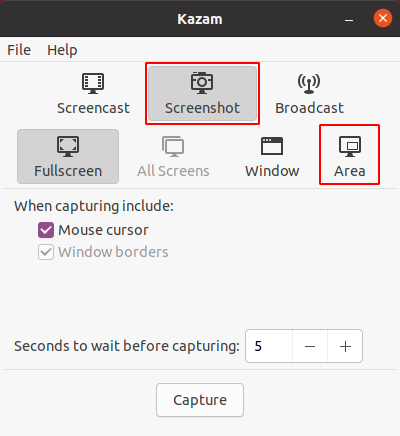
Once the screenshot is taken you will see a window to save it.
Recording screen using Kazam
Click on Screencast and again select the options among Fullscreen, Window, or Area also mark the options if you want to record sound in screen recording, and finally click on the Capture to start recording.
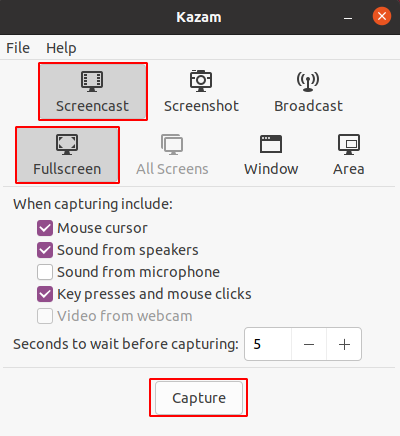
Once the recording is completed just click on Finish Recording.
You can also use the following shortcuts to control the recording functions of Kazam.
- Windows key + CTRL + R – Start recording.
- Windows key + CTRL + P – Pause recording, press again to resume.
- Windows key + CTRL + F – Finish recording.
- Windows key + CTRL + Q – Quit recording.
Remove Kazam from Ubuntu
For any reason, if you want to remove the Kazam from your Ubuntu system then use the following command in your terminal –
sudo apt remove kazam -yAlso, remove unused dependencies by using the given command –
sudo apt autoremoveConclusion
Ok, so you have installed Kazam successfully on your Ubuntu system. Now if you have a query then write us in the comments below.