VirtualBox is a free and open-source tool by Oracle to run virtual machines on a system. It is available for different operating systems including Windows, macOS, and Linux.
By creating virtual machines on a system you can install multiple operating systems within your host OS. For example, you can install different distributions of Linux inside Windows.
In this article, I will discuss how to install VirtualBox on Ubuntu (I will use Ubuntu 20.04 LTS). You can follow this guide also for installing VirtualBox on other Debian-based systems such as Linux Mint, POP_OS!, Kali Linux, etc.
We already discussed how to install VirtualBox on Windows.
System requirements
To install and use VirtualBox on a system you should have a computer with a minimum configuration as given below.
- A recent 64-bit version of Ubuntu installed
- 4 GB RAM
- 30 GB of internal storage
- x86_64 CPU, with Intel VT-x/AMD-V/SVM
Installing VirtualBox from Ubuntu repository
The easiest way to install VirtualBox in Ubuntu is to download and install it from the Ubuntu repository. The downside of this method is you may not have the latest software that you are going to install.
First, open your terminal and update the local package database on your system –
sudo apt update
Now to install VirtualBox use the given command –
sudo apt install virtualbox
Next, use the given command to install the Virtualbox extension pack –
sudo apt install virtualbox-ext-pack
This will enhance the VirtualBox by adding USB 2.0 and 3.0 support, remote desktop, and encryption.
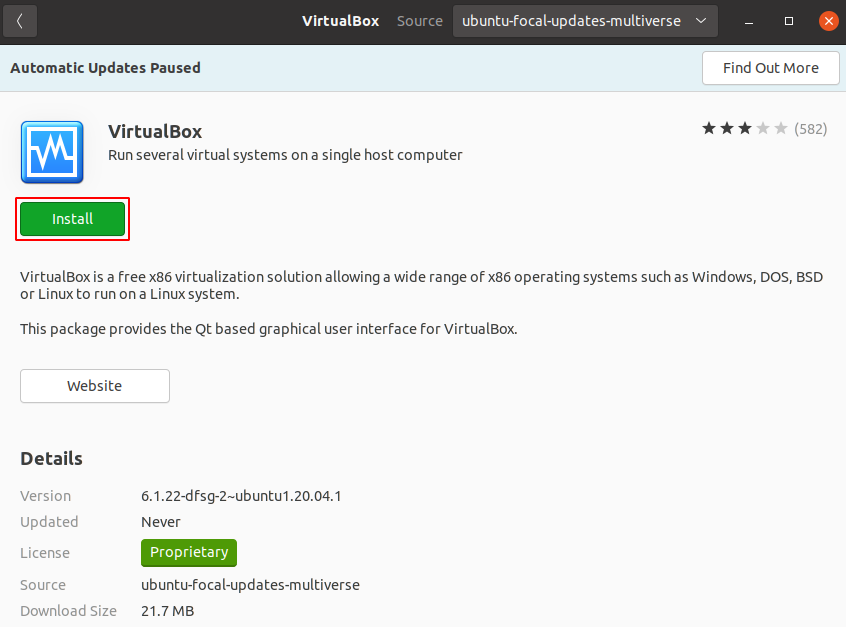
Alternatively, you can download it from Ubuntu Software. Open Ubuntu Software on your system and then search for Virtualbox.
Now click on the Virtualbox that appears in the search and click on the Install to install it on your system. This may ask you to enter your password.
Installing VirtualBox from Oracle’s official repository
The benefit of this method is that you get the latest software officially. Before you install the VirtualBox from the official repository of Oracle you need to install a few things.
Use the given command to install the required packages on your system.
sudo apt install software-properties-common
Install the GPG key
The GPG key allows you to verify and communicate with the VirtualBox repository.
Use the given command to install the GPG key on your system.
wget –q https://www.virtualbox.org/download/oracle_vbox_2016.asc -O- | sudo apt-key add -
wget -q https://www.virtualbox.org/download/oracle_vbox.asc -O- | sudo apt-key add -
Next, add the Oracle VirtualBox repository to the list of repositories using the given command –
sudo add-apt-repository "deb [arch=amd64] http://download.virtualbox.org/virtualbox/debian $(lsb_release -cs) contrib"
Install the latest version of VirtualBox
After adding the repository again refresh the local package database by using –
sudo apt update
Now use the given command to install the latest version –
sudo apt install virtualbox-6.1 -y
At the time of writing this article, virtualbox-6.1 is the latest release.
Launch the VirtualBox in Ubuntu
Once it gets installed on your system you can launch it by navigating to the Activities dashboard. Search for Virtualbox if appear click on the icon to launch it.
Alternatively, you can launch it from your terminal by using –
virtualbox
This will open the application.
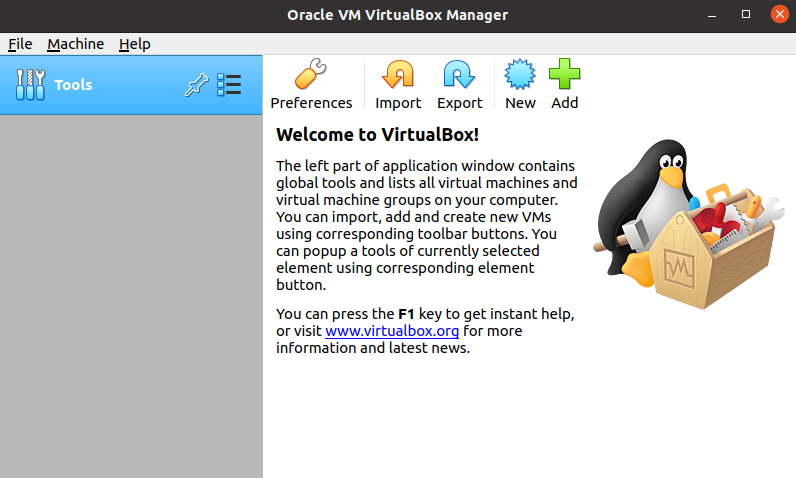
Here you can create or import a virtual machine. Now if you want to remove the virtual box from your system you can use the given command to remove it.
sudo apt remove virtualbox* -y
This will remove the VirtualBox from your system.
Conclusion
Ok, I hope this article is helpful to you. Now for any query write us in the comments below.